Button
Description

Clicking this button adds a record. The user must first select Active Records to activate the button.
 Calendar
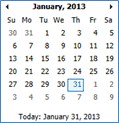
Clicking this button opens the calendar select dialog.
|
|
||||||||

Clicking this button prevents any updates made during this session from being retained.
 Details
or Edit button
Details
or Edit button
Click this button to view and edit additional record information.
 Download
single document
Download
single document
Clicking this button will enable the download of all active documents on the page into a single zip file grouped within subfolders. The document groups will be converted to folders within the zip file. The button will be visible if the Enable Document Export to Zip File Configuration Variable in the Documents Configuration Group is set to true, which is its default value. In addition, the user must have Export permission for the page. If there is a problem downloading a document, the name of the document may be too long. The user can shorten the document name.
 Download more than
one document
Download more than
one document
Clicking this button to download opens a window that allows the user to open and save the desired document.

Clicking this button places all attached documents into a zip file.

Clicking this button opens a specific Excel list linked to the Global Contacts. You can replace the standard report with a custom report by going to System Tables/Page Reports.

Clicking this button places the current page onto the Favorites page, which is signified by the Star on the left hand side of the page.

Clicking this button opens the online manual. You can perform searches and click through the Table of Contents.

Clicking this button changes the record to no longer be active or in use. Once inactive, you can click the Make Active button to reactivate the record.

Clicking this button, a confirmation dialog will be displayed to the user. If the user confirms the initialization, the existing data in the project database (including the audit trail) will be permanently deleted and replaced with sample data based on the values set by the user in the data fields. A progress bar will be displayed to the user during the initialization. This button is only available on the Project page.
 Linked
This icon indicates that the record is linked to another system record.

Clicking this button changes the inactive record to active and will be able to be used.

Clicking this button saves the record, closes the module, and another module for more information to be added.
 Not
Linked
Not
Linked
This icon indicates that the record is NOT linked to another system record.

Clicking this button opens the current page in a new browser window in a printable format.

Clicking this button shows the record's unique identifier, its active/inactive status, date/time and person who created it, and when and by whom it was modified. See Properties link. Click X or Cancel to return to the editing module.

Clicking this button updates the list with the most current data from the database using the existing values that are defined on the page. It does not refresh the filters on the page. Use the F5 key on your keyboard or the refresh icon on your browser.
Reorder Buttons
![]()
![]()
The two arrows move the rows up
![]() or down
or down ![]() . Inactive
records always will be excluded during the reorder process. When
an inactive record is reactivated after the records have been
reordered, then the record will appear at the end of the list.
. Inactive
records always will be excluded during the reorder process. When
an inactive record is reactivated after the records have been
reordered, then the record will appear at the end of the list.

Clicking this button opens a specific report linked to Global Contacts. You can replace the standard report with a custom report by going to System Tables/Page Reports.

Clicking this button sets the Records Filter to Active, the Search field to blank, and all other filters and buttons to their default values and states. The list will be refreshed with the most current data from the database using the default values that are defined on the page.

Clicking this button brings the user back to the previous screen..

Clicking this button retains the information that was entered and exits the module.

Clicking this button retains the information that was entered and stays in the module.
 Search
Clicking this button will perform a search of the information that was entered into the search field and bring back the records that meet the search criteria.

Clicking this button places a check in all of the check boxes below, which means that all of the document types will contain the custom field(s).

Clicking this button removes the checks in all of the check boxes below, which means that none of the document types will contain the custom field(s).

Clicking this button lists all records including those that have been inactivated.

Clicking this button lists only the active or current records.
Fields
Special Features
Audit Trail module
The Audit Trail module displays the audit trail records in descending order by date and time. The user must have read permission for the Global Audit Trail or the Project Audit Trail features, depending on the value (Global or Project) of the Audit Trail Location field on the Properties tab.
Date and Time fields
Date and time data are always stored as a full date and time in the database, even if only the date or the time is displayed.
The unknown time for a date field where the Show Time Property is set to false will be stored as 00:00:01 AM.
The unknown date for a time field where the Show Date Property is set to false will be stored as 01/01/1900.
The minimum allowable date is 01/01/1900 and the maximum allowable date will be 12/31/2049. These ranges may be modified by other properties in this control but may never exceed the bounds of these ranges.
Enter T for today's date
Use up arrow or + sign to go to the next day
Use down arrow or - sign to go to the previous day
Use Pg Up to go to the next month
Use Pg Dn to go to the previous month
Numeric Fields
To edit a numeric field, click anywhere in the field, right-click using the mouse, and choose Select All. Type the new number or hit the spacebar to just delete the value.
As an alternative, click just to the left of the number in the field and type the new number. This should overwrite the old number.
Project Drop Down Selection
Initially entering the system, this field will be blank; otherwise, the current project will be displayed. Click the Project button to change the project while on any page.
Spell check
Since all major browsers, including Internet Explorer and Google Chrome, offer spell check functionality, ClinPlus CTMS does not incorporate this feature in the system.
Other
CTMS Agent
The CTMS agent service runs in the background and performs automatic tasks, such as sending notifications or managing the statistics queue. An error message can occur when the agent and another process, such as running a report, attempts to access the same record at the same time. Most often, the error message can be ignored because the Agent is designed to keep trying until the task is complete.